Shifting and Tilting of Well Foundations
14 December 2018Table of Contents
Shifting and Tilting of Well Foundations
Shifting and tilting problems occurs generally during sinking process of well foundations. If proper care is not taken, they will cause serious problems and weaken the stability of foundations. Precautions to avoid shifting and tilting, limitations and rectifying methods are discussed below.
Shifting and Tilting of Well Foundations
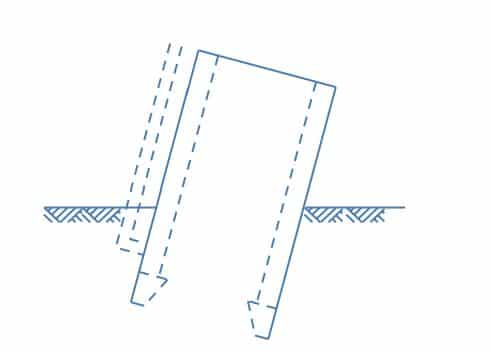
- When the well is moved away horizontally from the desired position, then it is called shifting of well foundation.
- When the well is sloped against vertical alignment,it is called tilting of well foundation.
Precautions to Prevent Shifting and Tilting
It is safer and economical to avoid tilting and shifting of wells by adopting the following preventive measures:
- The outer surface of the well curb and steining should be level, straight, and smooth.
- The radius of the well curb should be kept 2-4 cm more than the outer radius of the well steining.
- The cutting edge should be sharp and of uniform thickness.
- The steining should be built in lifts and the entire steining height should be built in one straight line from bottom to top at right angles to the plane of the curb.
- Dredging should be uniform on all sides of the well. For a twin well, dredging should be uniform in both the wells.
- The well should be constructed in stages of small height increments.
- The magnitude and direction of sinking of wells should be properly and carefully monitored on a continuous basis to identify any tilt or shift and adopt appropriate corrective measures immediately to rectify the same.
- If the well shows a tendency for tilting, dredging should be done on the higher side. If this does not bring required improvement, sinking should be stopped and should be resumed only after the tilting is corrected.
- Dredged material should not be deposited unevenly around the well.
- When a kentledge is used to provide additional sinking effort, it should be placed evenly on the loading platform.
Limitations
- The maximum tilt allowed in case of well foundation is 1 in 60.
- The shift in well foundation should not be more than 1 % of depth of sunk.
- Beyond the above limits, well foundation is considered as dangerous and in such a case, remedial measures to rectify shifting and tilting should be followed.
Rectifying Methods
Rectifying methods for Rectification of shifting and tilting problems in well foundations are as follows:
- Eccentric loading
- Excavation on higher side
- Water jetting
- Pulling the well
- Using hydraulic jacks
- Using struts
- Excavation under cutting edge
- Wood sleeper under cutting edge
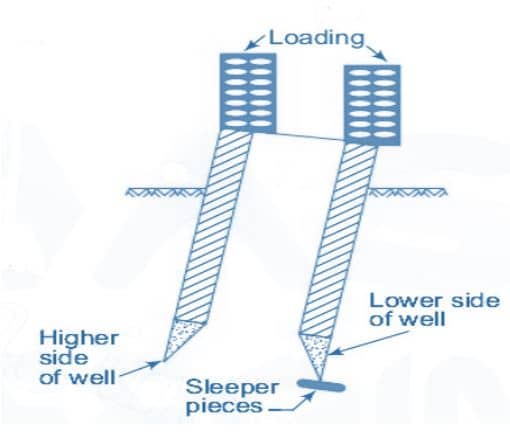
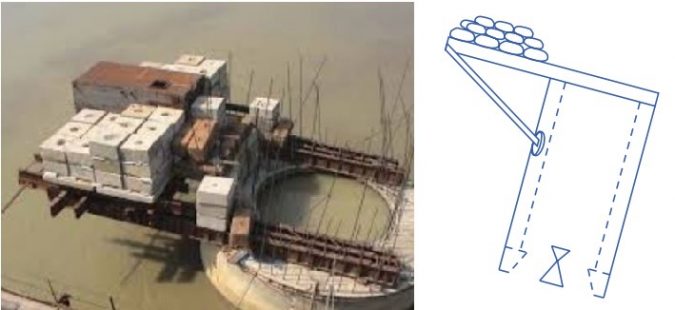
1. Eccentric loading
- The well tilt can be rectified by placing eccentric loading on the higher side. Higher side is nothing but the opposite side of tilt or lower side.
- A loading platform is constructed on the higher side and load is placed on it.
- This eccentric load will increase downward pressure on higher side and correct the tilt.
- The amount of load and eccentricity is decided based on the depth of sinking.
- Greater is the depth of sinking of well, larger will be the eccentricity and load.
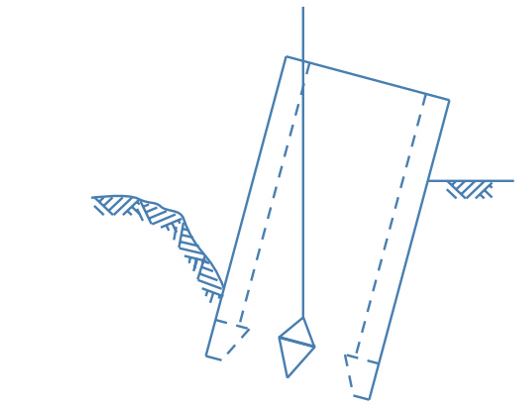
2. Excavation on Higher Side
- When well is tilted to one side, excavation should be increased on the other side which is opposite to tilted side.
- This technique is useful only in the initial stages of well sinking.
3. Water Jetting
- Water jetting on external surface of well on the higher side is another remedial measure for rectifying tilt.
- When water jet is forced towards surface of well, the friction between soil and well surface gets reduced and the higher side of well becomes lowered to make well vertical.
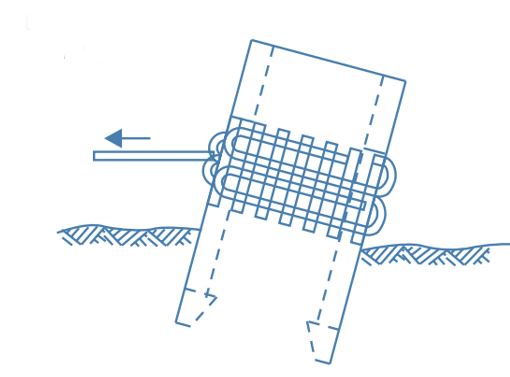
4. Pulling the Well
- The well can be pulled towards higher side using steel ropes.
- One or more steel ropes are wound around the well with wooden sleepers packed in between well and ropes to prevent damage to the well steining by distributing load over to larger area of steining.
- Pull should be carefully done otherwise,shifting of well foundation may occur.
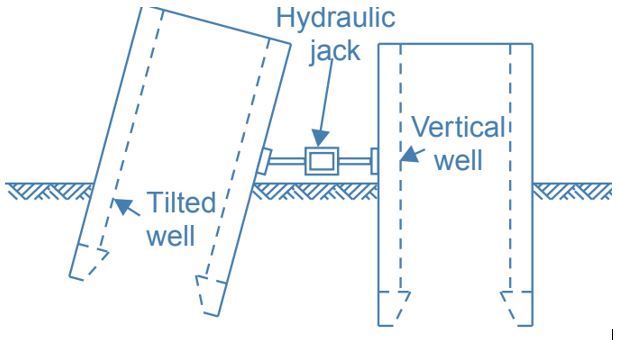
5. Pushing using Jacks
- Another method to rectify tilting and shifting of well foundation is using hydraulic jacks or mechanical jacks, the tilted well can be pushed from lower side to higher side.
- Neighbor vertical well foundations or suitable arrangements made will give support to the jack system.
- Care should be taken while pushing the well otherwise the well may shifts.
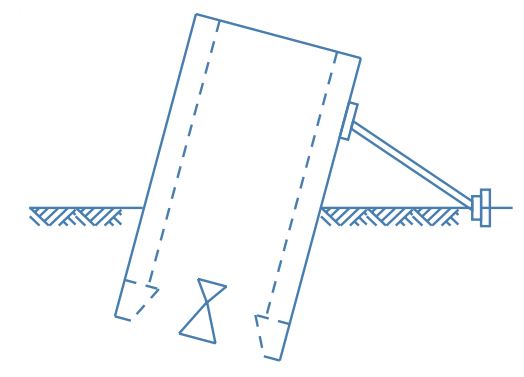
6. Using Struts
- By providing struts as supports on the lower side or tilted side of well, further tilting can be prevented.
- Wooden sleepers are provided between struts and well steining to prevent damage to well steining and to distribute pressure to larger area.
- Struts are rested on firm base having driven piles.
7. Excavation under Cutting Edge
- This technique is used for hard strata soils. In this method, the well is de-watered first and open excavation is carried out exactly under the cutting edge on the higher side.
- If de-watering is not possible, soil strata is loosened using suitable equipment with the help of professional divers.
8. Wood Sleeper under Cutting Edge
- If tilting towards lower side is increasing,then wooden sleepers are placed under cutting edge on lower side to control the tilting temporarily.
- When well is corrected to vertical level, this sleepers can be removed.